Composting is a fantastic way to transform organic waste into nutrient-rich soil that can benefit your garden and reduce your environmental footprint. Among various composting techniques, building a static aerated compost pile stands out for its simplicity and effectiveness. This method allows for the decomposition of organic matter through a controlled aerobic process, ensuring a faster breakdown and minimizing odors. In this blog post, we will walk you through the step-by-step process of building a static aerated compost pile, enabling you to create nutrient-dense compost for your gardening needs.
Step 1: Choose the Right Location
Selecting an appropriate location for your compost pile is crucial. Look for an area that receives partial sunlight and is easily accessible. Avoid placing it too close to your home or any sensitive areas. Additionally, ensure the spot is well-drained to prevent waterlogging.
Step 2: Gather the Materials
To build a static aerated compost pile, you will need a mixture of green and brown organic materials. Green materials include fresh grass clippings, vegetable scraps, and coffee grounds, while brown materials consist of dried leaves, straw, and small twigs. Make sure to have a good balance between the two types to maintain optimal composting conditions.
Step 3: Prepare the Base
Clear the chosen area of any debris, weeds, or grass. Create a base layer using coarse organic material like small twigs or straw. This layer aids in proper aeration and drainage while preventing the pile from becoming compacted.
Step 4: Layer Green and Brown Materials
Alternate between green and brown materials as you build the compost pile. Start with a layer of brown materials, such as dried leaves or straw, approximately 6-8 inches thick. Follow it with a 2-4 inch layer of green materials like vegetable scraps or grass clippings. Continue this layering process until you have utilized all the organic materials, ensuring the pile remains around 3-4 feet in height.
Step 5: Water the Pile
Moisture is essential for the composting process. Lightly moisten each layer as you build the pile, ensuring it remains uniformly damp but not waterlogged. This promotes the growth of beneficial microorganisms and aids in the decomposition process.
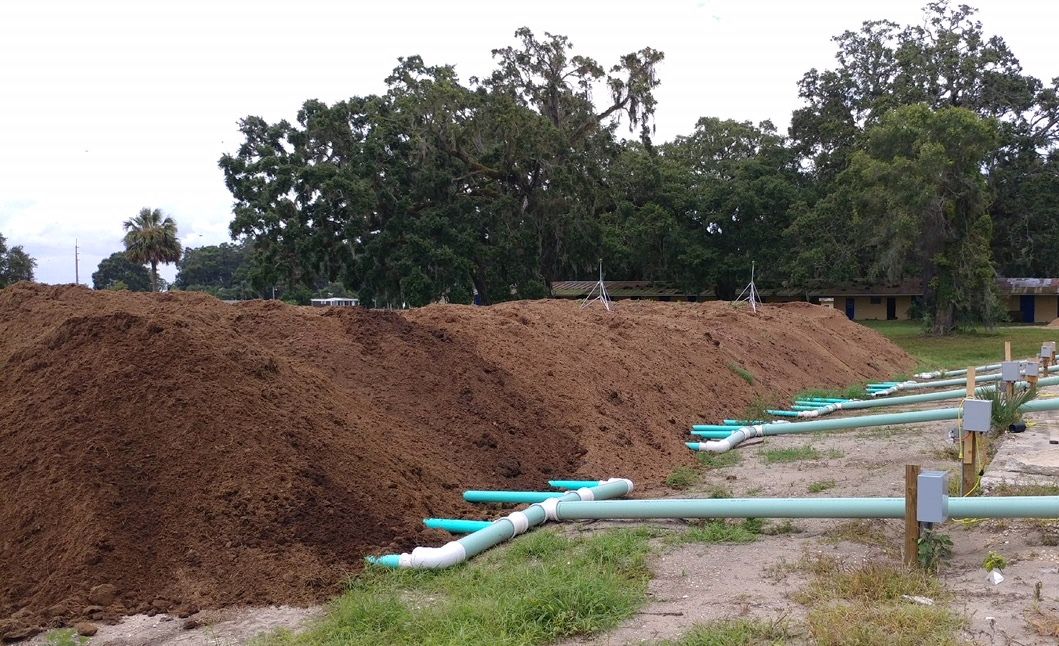
Step 6: Incorporate Aeration Pipes
Static aerated composting relies on the introduction of air into the pile to facilitate the decomposition process. Insert PVC pipes, with small holes drilled along their lengths, vertically into the pile at regular intervals. These pipes allow for air circulation and help maintain oxygen levels necessary for aerobic decomposition.
Step 7: Cover the Pile
Covering the compost pile helps retain heat and moisture while preventing excess water from entering. Use a breathable material like a tarp or a layer of straw to cover the pile. Ensure it is secured properly, allowing for easy access if required.
Step 8: Monitor and Maintain
Regular monitoring is vital to ensure the composting process proceeds smoothly. Check the moisture levels periodically and add water if the pile becomes dry. If the compost pile begins to emit foul odors, it may be an indication of inadequate aeration. In such cases, gently turn the pile using a garden fork to reintroduce air into the mixture.
Step 9: Allow for Decomposition
The composting process typically takes several months to a year, depending on various factors such as temperature, moisture levels, and the materials used. Over time, the materials will break down, and you will notice the compost transforming into a dark, crumbly substance. This signifies that the compost is ready to be used in your garden.
Building a static aerated compost pile is an excellent way to convert organic waste into nutrient-rich compost for your garden. By following the step-by-step guide outlined in this blog post, you can create an efficient and effective composting system.
Remember to choose a suitable location, gather a balance of green and brown materials, and create a base layer for proper aeration and drainage. Layer the materials, ensuring adequate moisture throughout the pile, and incorporate aeration pipes to promote airflow. Cover the pile to retain heat and moisture, and regularly monitor and maintain the composting process.
As the materials decompose over time, you will witness the transformation of the compost pile into dark, crumbly compost, a valuable addition to your gardening endeavors. Applying this nutrient-rich compost to your plants will enhance soil fertility, promote healthy growth, and reduce the need for chemical fertilizers.
Composting not only benefits your garden but also reduces the amount of organic waste sent to landfills, helping to combat climate change and protect the environment. So, start building your static aerated compost pile today and contribute to a more sustainable future.
Happy composting!
